
What the destination mail server is
The destination mail server is your own mail server: the one that holds your mailboxes. SpamDuster receives your mail first, filters it, and delivers the clean mail to the destination mail server. Until a destination is set, SpamDuster cannot deliver anything.
Set the destination mail server
- In the console, open Advanced.
- Under Destination mail server, enter the server's host name or IP address in Host / IP.
- Enter the port in Port. Most mail servers receive mail on port
25. - Optionally, enter a real mailbox on your domain in Test with address, for example
[email protected]. - Select Save & test.
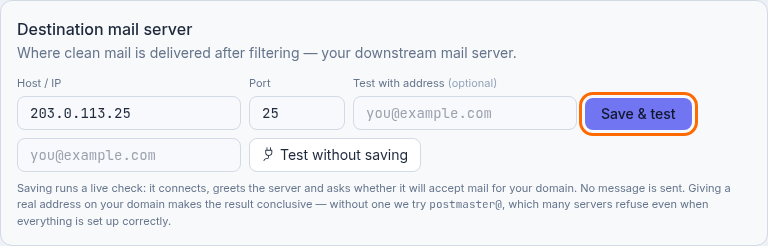
To check a server without changing anything, select Test without saving instead.
What the test checks
The test connects to your mail server, greets it, and asks whether it will accept mail for your domain. No message is
sent. Entering a real mailbox in Test with address makes the result conclusive; without one, the test asks about
postmaster@ your domain, which some servers refuse even when everything is set up correctly.
Allow the SpamDuster server on your mail server
Yes, your mail server must accept mail from your SpamDuster server. All your filtered mail now arrives from the SpamDuster server's IP address, so:
- allow that IP address through any firewall in front of your mail server, on the port you entered;
- if your mail server rate-limits, greylists or blocks by IP address, add the SpamDuster server's IP address to its trusted or allowed list.
To find the IP address, look up the address of your Mail host (MX target), the host name in your welcome email.
For example, on a computer with a terminal: nslookup 123456.customer.spamduster.com.
If the test reports that your server refused the domain or the connection, see The destination test fails.